

Here it is!
My Weaving Spool Rack.
And, I LOVE it.
 Since it would seem I have a penchant for weaving with embroidery and sewing threads--easy to do as I tend to weave in miniature--necessity warranted a better method of storing numerous spools and/or bobbins for immediate access, for any given project. This spool rack does exactly what I needed it to do. Though, for a while [until it was officially complete] it ended up being more in the way. Perfectly useful; but--- I could no longer easily access the things I had on the shelves behind where it leaned for support. So, I was just a tad desperate to get the issue resolved before I set up to continue weaving. It just took me a while to get it all figured out.
 From where did my idea even come? I have another circular WIP [which means a really cool pending blog post! SOMEday.], where I fashioned tool [where none existed], in order to meet a specific need. Some of my Facebook Friends may remember the wicked looking hook I fashioned out of an old 12" Barbecue Skewer [found in my tool basket], to use to create a circle of loops.
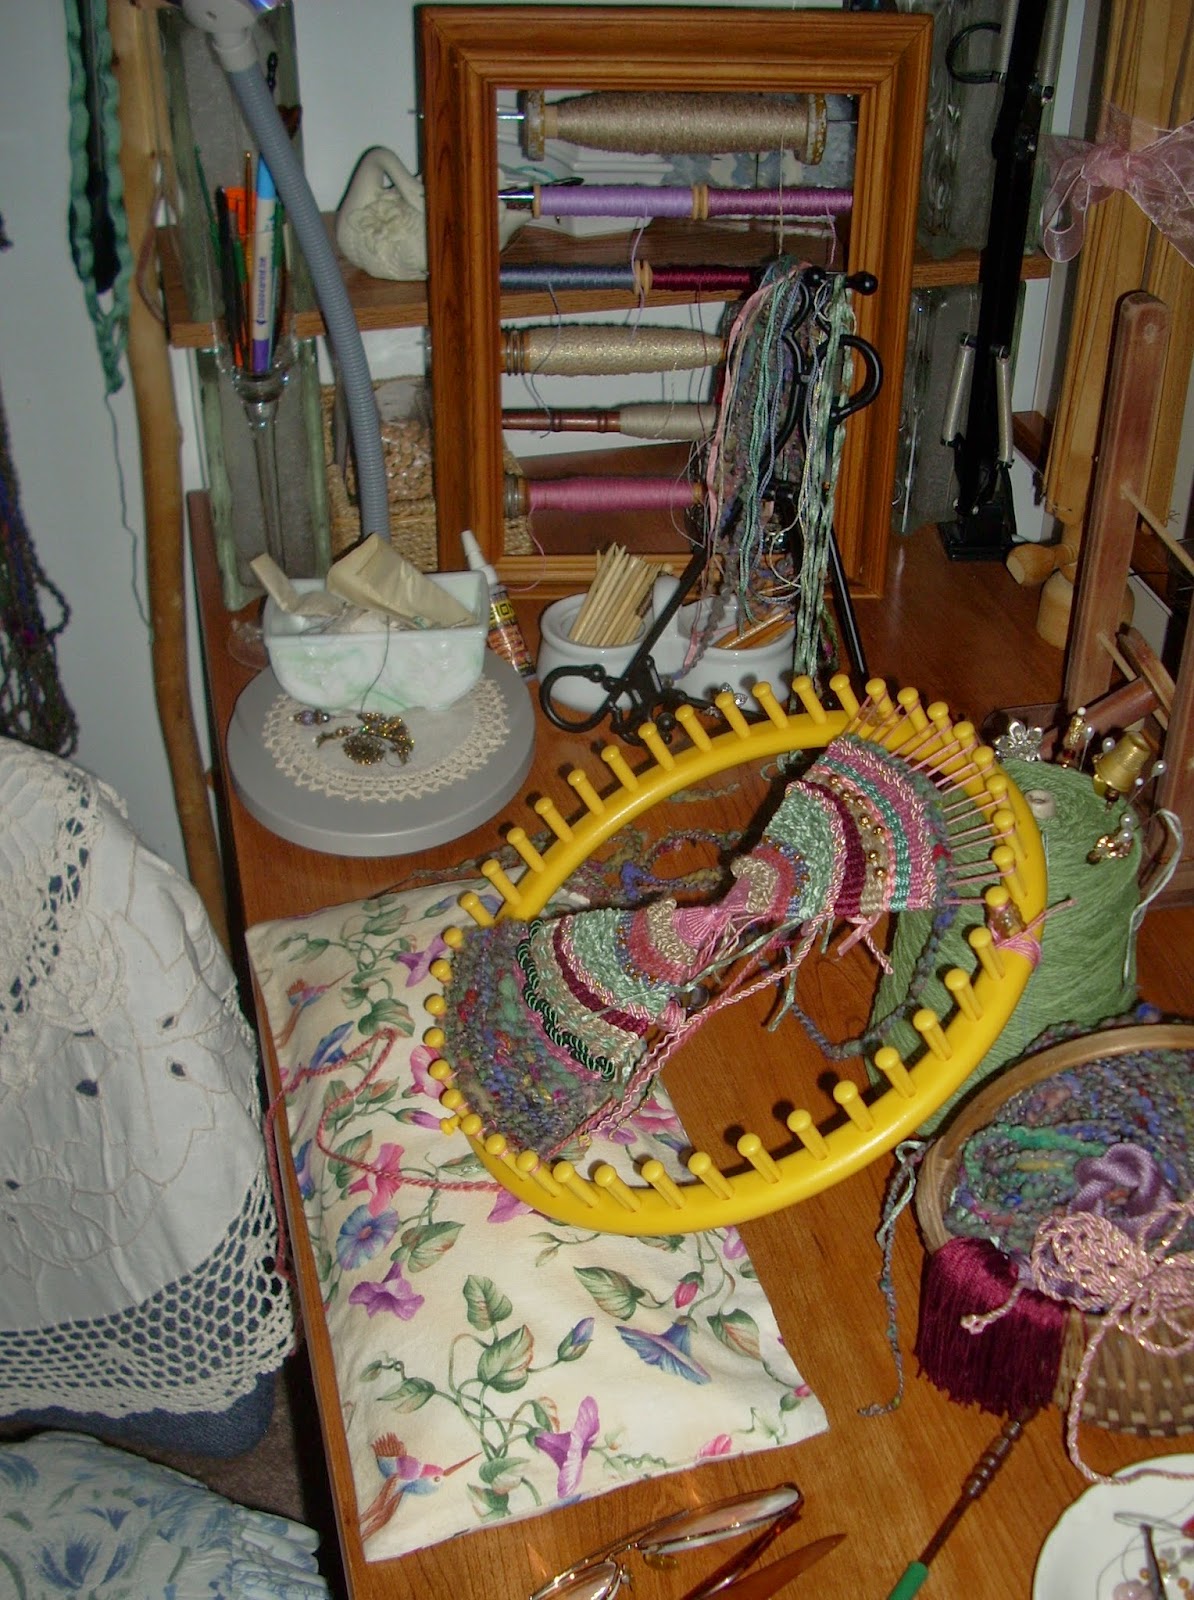
  Here's a photo of the Practice Loom I set up in order to experiment with my new tool and the process I wanted to achieve. [More on that below, in What's Next?] But, it was that same skewer that gave me the idea for creating a wider rack; something akin to a vertical Lazy Kate.
SPECIAL NOTE: For a larger view of individual photos:
Right Click on a photo and chose either
Open link in new tab --or-- Open link in new window
So, I took another skewer, that I had on hand, and auditioned just how many spools of thread I could load onto it, and then I figured out what size picture frame I would need to bring my idea to fruition.
 I did a little window shopping on ebay, and found an old "estate" sale, real wood picture frame for $12.00 [along with FREE S/H]. It was rough and unfinished; but--- I was quite OK with that. I did a LOT of sanding to make it look nice. But--- A commercially finished 8 1/2 X 11 1/2 frame, with professionally mitered corners [and not made of particle board], would likely have run well over $50.00. And, THAT was no where in my very low income budget. At any given time.
After that particular investment, anything else I was going to do, would need to be done with what I already had available. There would be no more shopping for what would likely have worked better or be easier to use. I was going to have to make do.
 That all said--- I was already making do with an old Lazy Kate [another ebay find], and what it could hold; which did make things a little easier as I progressed into developing my own style and method of weaving. But, as I started to introduce or audition more colors and textures, I started to collect additional spools and balls of #8 embroidery threads on my work table.

While loading one onto the lazy kate seemed helpful at the time, it was a bit awkward 'rolling' the coned ball of Pearl Cotton Crochet Thread to unwind and measure out the required lengths.

 |
PhotoBomber! That's my Lucy.
|

_________________________________________________
A Quick Look at the Eye Screws

 Before I go on about how I created the Support Stand, let me share a quick look at the back of the picture frame, and placement of the Eye Screws. I simply gauged my placement based on the sizes of the larger vintage bobbins I wanted to press into service.

I drilled the holes and then added a dab of wood glue prior to inserting the Eye Screws.


__________________________________________________
On to the Support Frame
 As I've already alluded to, adding support to the frame was a bit of an after thought. I had a totally different idea in mind, i.e. Shelf Brackets. But, that idea went quickly by the way of things soon after I realized it would not work; due to the very placement and functionality of the eye screws already in place. So, having a bundle of 1/4" [well, more like 5/16"] weaving slats on hand, I glued together [for additional strength], three sets of slats, and then I went about fashioning my Support Frame.
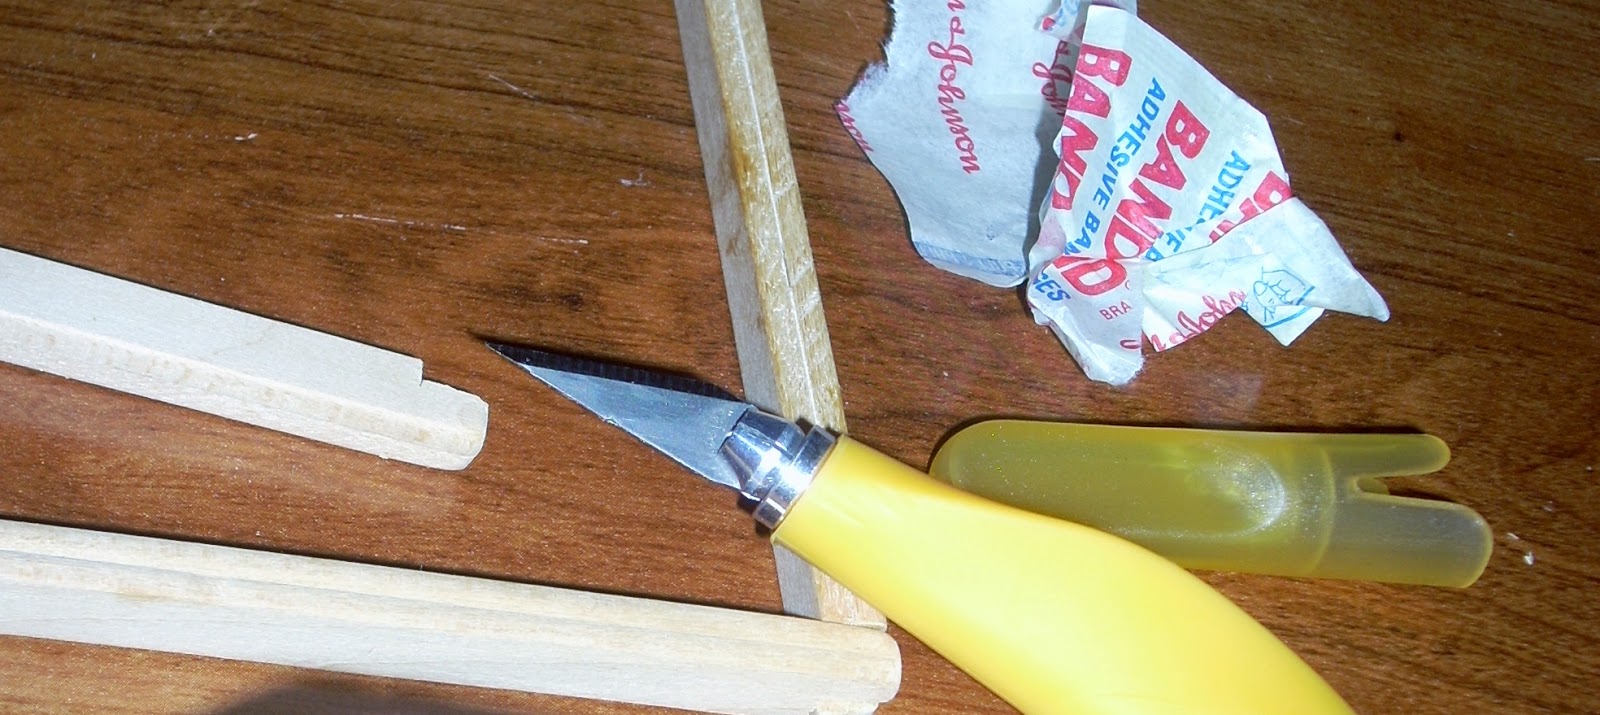
There was blood as I notched the corners. And, Band-Aids were required! But, I got the corners to join nicely. And, that made me a very Happy Camper.
 After I gave the Support Frame a nice coat of wax, next I had to figure out how attach the Standing Support Frame to the actual Picture Frame. For this, I had a box of Decorative Wall Hardware that I'd won as a door prize several years ago during an online Studio Tour. I decided to use two of the decorative picture hangers to anchor my support ends, and create a pseudo-hinge.
 While I was happy with the notched corners, I wanted to glue some old-school picture hangers into the lower corners for additional strength. Once dry, I wrapped them with Waxed Linen.
 With the picture hangers glued and nailed into place, I then cut two small pieces from an old 2.25mm DPN to use as Pins. [One needle (from a 5 needle set) that had a squared-off tip--rendering it useless; unless sharpened.] They were easy enough to snip, sand, and then set securely into place. After drilling two small holes, they fit just snug enough, that I don't have to worry about them falling out, haphazardly.

Next, I added a short chain [a watch fob chain], hooks, and a jump ring [from my beading and findings stash], to help create a bit of stability to the Support Frame.


I used the Jump Ring on the support frame side, and secured it simply by wrapping it with Waxed Linen.

_________________________________________________
Now, Back to The Lean
 As I said earlier, Support Frame or no, the rack worked perfectly well as is. That was until I needed to access anything that was stored on the shelves. And, when other things started to get set in front of the rack, it just made it all the more less easy to move out of the way in order to retrieve any particular whatnot from behind. I had been using a set of Heddle Blocks [reinforced with rubber shelf liner glued to the bottoms] from my old Beka Rigid Heddle Loom.

This was the configuration of bobbins during the weaving of my Garden Pouch. [Blog post pending.]
Bottom line? This rack is so easy to work from; just pull a thread and then snip.
.jpg)
_______________________________________________
Collapse, Flatten, and Store Away
 The next few photos are fairly self-explanatory. It is easy enough to pull the pins, and remove the Support Stand from the decorative picture frame loops, in order to flatten for storage or travel.
.jpg)

And, just look how much more I can work with on this rack [four spools of thread instead of two on a standard Lazy Kate (I just finished refurbishing this one)], and in any given combination of spools and/or bobbins; old and/or new. I can also load a standard-size spinning wheel bobbin of freshly spun or plied yarn if I so desire.

I'm not expecting that anyone else will be crafting this same sort of rack. [Though, you are more than welcome to do so!!] It's just that I had a specific studio need, and this was my way of finding a solution. If you find it will be as useful to you in some fashion--- Well, then--- My job here is complete. [I try always to use my Super Powers for Good. (~: ]
I simply decided to share this project, in the hope that it would serve to inspire someone else to discover a Possibility, and subsequently--- determine how to resolve the Need. And then, to likewise share it forward. To--- Inspire!
___________________________________________
What's Next?How to make a Looping Hook for Weaving in the Round. Similar to weaving Pile for Terry Cloth, [excellent Terry Cloth Weaving video], I took my inspiration for this tool directly from Pibiones Weaving.  I'll show you how I practiced my method, how I incorporated it into my Garden Pouch, and how I intend on weaving more of this into Roundness. Meaning--- this is definitely a post that should be covered prior to posting the Pictorial Tutorial of the Garden Pouch.
___________________________________________
Leave any questions you may have in the Comments.
Or Facebook Friends can Private Message me.
Follow me to my Facebook Community Page @ HeartSong Studio
Bye for now, and Blessings~
And Happy Weaving!


.jpg)


