
Welcome the Part Three

This is the next installment in the series of tutorials for Circular Needle Weaving using a Knifty Knitter Loom. In this tutorial you will learn how to lay in a round of pre-strung beads. And it is with this very technique that you might begin to see the creative advantage in using a Knifty Knitter loom for weaving in the round. There is nothing to obstruct what you would either need, want, or desire to do.
Here are a few items to have on hand for this technique:
A curved upholstery needle ~~[best option]
A large long needle ~~[if you simply do not like working with upholstery needles]
A quilting or beading needle ~~[a quilting needle between works just fine [depending on the bead and thickness of thread] if you do not have any beading needles. Always do a test run.]
Tweezers
Beads ~~[Placement in your weaving will determine Size; or vice versa.]
Beading Thread ~~[See below for Special Note]
Bead Board ~~[Optional]
Rubberized Mat
Scissors
Hair clips
The needle you use to secure and tie off the round
will be based on preference; what works for you.
[Will speak to that more, further down.]
.jpg)
Choosing a Beading Thread
For the avid beader, you likely already have a favorite beading thread on hand [or threads; depending on any given project], so just use what is appropriate for the outcome of your weaving project.
For those who are newer to beadwork, see below for the Special Note article on how to determine the proper thread for your project. Does your thread need to be supple or stiff?
[Based on the beads being used--glass or metal; smooth or abrasive, etc.]
 |
Photo courtesy the Internet
|
Answer the following questions and chose accordingly.
Will your weaving be purely decorative or ornamental? [I.e. a wall hanging] Or do you intend your project to be utilitarian and functional?
________________________________________________________
How to Chose Size and Placement of Beads
This tutorial will show an alternation of 4mm and 6mm beads; placed approximately 2 3/4" out from the center knot.
The determining design factor for this example? The uneven spacing of the warp threads.
[OK! THAT--- and not enough 6mm beads [or 4mm beads for that matter] on hand, to string all the way around. That's where Creativity comes in to play. That and simply wanting to work with a larger millimeter bead.]

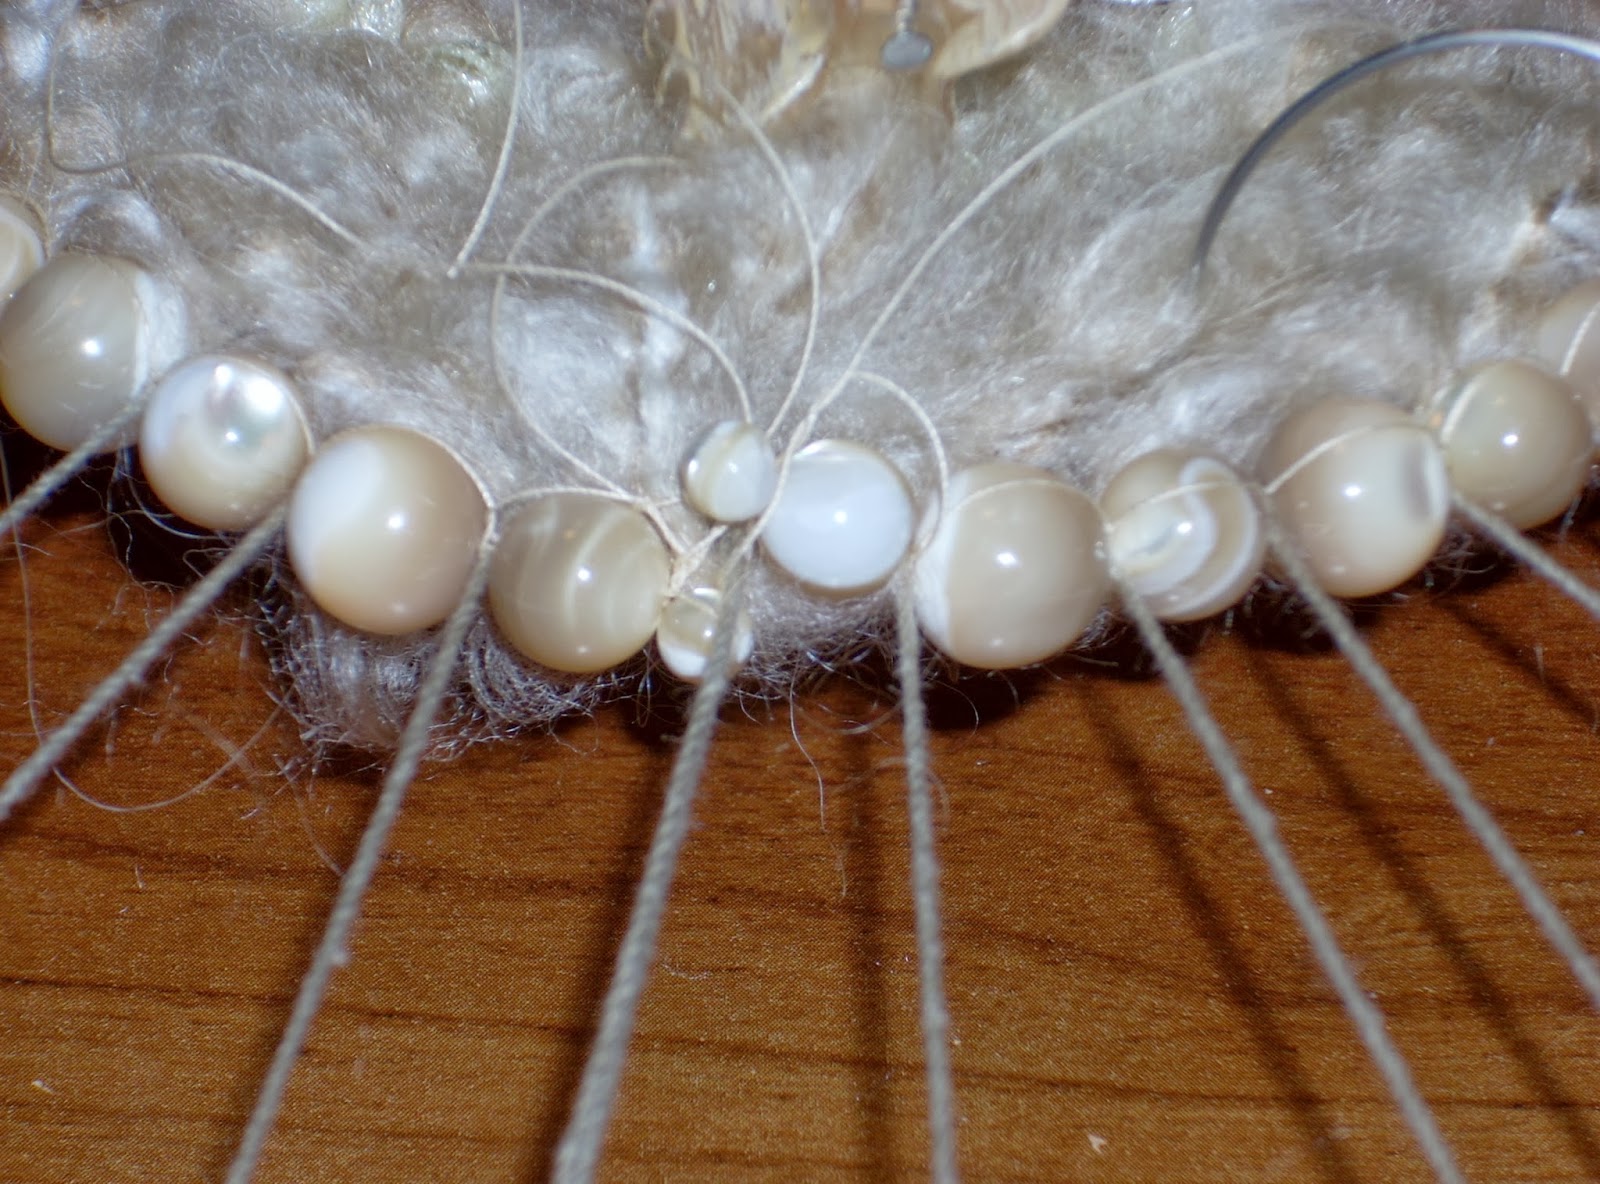
Another key design factor to consider, closer in [as shown below], the warp threads appear more evenly spaced. The following example features a round of 2mm Natural Mother of Pearl beads that was added in fairly close to [approx. 1 3/4" from] the center knot.
That said, using the same size of bead all through your strand--whether 4mm or 6mm--will only matter as regards to how far out [or in] you desire to lay in your beads. And for that, you can always do a test run.
But, two Rules of Thumb to keep in mind for this technique:
Either--
Desired Size of beads will determine Placement of strand within your weaving
or
Desired Placement of strand will determine Size of beads to be used.
.jpg)
So, depending on your desired effect---
When you have a specific bead that you want to use, in order to know where to lay in your strand--[based on the size of your choice]--take a bead and nestle it in between the warp threads [without distorting the warp] to determine the best fit.
Weave to that point, and then stop.
When you have a specific point at which you chose to introduce your beads, then the design factor will determine the size of the beads to be used. [I.e. 2mm for closer in]
____________________________________________
Let's start stringing beads!

If all you need is a picture, click on the image above for a Slideshow.
Prepare your beading [or quilting] needle and thread.
Take a small bead to knot and use as a Stopper Bead.
It can be anything from a 1/0 seed bead, or one small enough that will not obstruct the final tie off, or show through to the front side.
A 2mm bead was used in this tutorial.
[Anything smaller would have been harder to photograph.]


For a larger view of any photo throughout this tutorial:
Right click on any given image, and then chose
Open link in new window
or Open link in new tab.
Next, count how many open spaces [the area between the warp threads], and then sort and count out your desired beads.
[The number of openings will vary depending on the loom size and/or the number of pegs]
If you keep a notebook or journal of your projects
you might want to make a notation of the spacing [per loom],
so that you don't have to recount every time you begin a new project.
[The loom in the example below has 41 open spaces.]

If you are working with more than one color or desire a specific pattern to your strand, you might want to use a flocked bead board to help determine your desired layout.
Once you are ready, simply start threading your beads.

Depending on the thread being used and/or the purpose of your end result, you may want to double up on the thread.
Though the initial tie on and off of the strand
would need to be modified with Crimp Beads,
instead of make-shift Stopper Beads.
would need to be modified with Crimp Beads,
instead of make-shift Stopper Beads.

Once you have strung all of your beads it is time to add another Stopper Bead.

As you begin to tie your knot, though, leave a bit of space between your last decorative bead and the stopper bead.
This will help to ensure you have enough leeway to properly work [lay] your beads into their respective spaces.
.jpg)
The upcoming Test Run [Audition] will help to show the importance of this step.

At this point, take your loom and push all of the warp thread loops from the top of the pegs to the base of the loom.

Turn over the loom, and position your Anchor Peg at the bottom; directly in front of you.
From here on you will work from the back side of the loom.
You might also want to lay the rubberized mat underneath your loom.
It will help to keep the loom from sliding around.

Time to audition your strand of beads.
Starting at the Tie On/Tie Off threads, lay the strand gingerly, positioning each bead into an opening.
If you find you need to add a few more rounds of weaving, remove the beads and then go ahead and do so.

Audition your strand again, to see if you are ready to secure it into place.

You are now ready to secure the front end of the strand.

Close up of the Tie On/Tie Off warp threads, and the stopper beads.

It is also time to choose between a large straight needle [seen below] or an upholstery needle.
Thread it with your beading thread, and tie on at the first stopper bead.

Tie a square knot.


Using an upholstery needle can be less disruptive as you work with the loose strand of beads.
If you choose to use a straight needle, it is less disruptive to simply run your needle down, and then back up from underneath.
Either way---
run your needle down behind the strand thread,
on the right side of the warp thread,
back up to the left of the warp thread,
to the front of the strand thread.

As you pull your thread through, leave a loop, and then insert your needle through the loop.

This creates a type of half hitch knot.

Another view.

Another close up.
As you pull the thread through, keep your finger on top of the bead being secured, and pull the thread taut.

A close up and cross section of the needle placement.

Continue working around your loom.

Pulling each knot snug and secure.

Working with an upholstery needle can make much quicker work of this process.


Again, if you prefer to use a straight needle, because the strand is sitting loosely upon your work in progress, it will be less disruptive if you simply run the needle down through, and then back up from the under/front side.
Being careful not to tilt your loom, and displace your strand of beads.

The tweezers are the perfect tool to help catch the previous row of woven fibers to make sure they do not get caught in the beading thread.
You could also affect the same result with the tines of a fork,
if tweezers are not readily available.

Helpful especially when working with fuzzier loftier fibers.

Another close up.

A close up of a secured portion of the round.

By the time you get all the way around, you will have discovered the importance of needing to leave yourself that bit of leeway when you finished stringing your beads, and tied on that second stopper bead.

After securing the last decorative bead, tie off the last bead and secure [knot] both of the stopper beads; one to the other.
Here again, use the hair clips to hold loose ends; which can be addressed when your project is finished.

Make sure [see below] that the small stopper beads are tucked to the back side.

Your subsequent rows of weaving will keep them hidden from view.

This technique [depending on the beading thread used] is virtually invisible.

You are now ready to continue weaving.
_________________________________________________________________________
There will be at least two more tutorials... one for binding off options, and another for specialty items; bonus and finishing techniques.

_________________________________________
Leave any questions that you may have in the Comments.
Or Facebook Friends can Private Message me.
Bye for now, and Blessings~
And Happy Weaving!

No comments:
Post a Comment